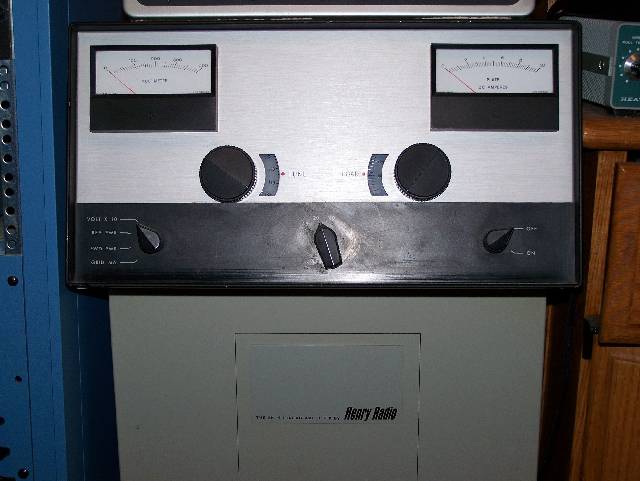
Latest Addition to the W4CLM Shack!
Henry 2K Repair Job
Latest addition to the shack is an Henry 2K-4 with Peter Dahl Hipersil Transformer
When I received this gem the filament connections on the 3-500z finals was melted loose due to failure of the original blower motor. it's shown below. When I first received the amp, I decided I would turn it on and see what if anything it would do. Isn't that what all hams do? Hee Hee... Needed to check and see if one of the components let the smoke out, the problem would be putting that smoke back into those failed components (Old ham joke!) Anyway, I don't recall hearing the blower running at first ~ I just can't remember if it came on or not ~ the amplifier was still in one piece on the deck and the covers were still on. Well the tubes did not light up and that was enough reason for me to pull the covers off and dive right in. The Henry amplifier is a bit heavy and not the easiest thing to put on a works bench so I laid the amp on its side and did some checking around under the bonnet, applied power again. This time I heard a Kla-Chunk and all of a sudden I noticed the fan was going. I then recalled the previous two owners of this device having complained about excessive fan noise from the amp. Apparently the blower was on it's way out and eventually failed during operation. The Henry got so hot at the base of the tubes, it literally melted the solder right out of the filament pin connection on one of the tubes. Not a good thing! Using two 3-500Z amplifier tubes each with 5 volts filament, each tube individually draws 14.6 Amperes, that makes one heck of a lot of current at start up and you can surely bet they heated up real quickly at the base of the tube sockets when that fan stopped!

I removed the old blower to see if it could be saved, tried lubricating the original blower on the bench and it started to work again but not a whole lot better, it had surely seen better days and was in dire need of replacement. Not having much invested in this amp in the way of $$$$$$ dollars. I decided I wanted to replace the blower and do the repair job with some OVER-KILL. I did not want to see a repeat of the problem again in my lifetime so the old fan was out and a search for a suitable replacement was on. I went on a search for fan with enough airflow, big enough to do the job yet small enough to fit under the PA deck. Number one concern was that I wanted an AIR FLOW SWITCH to shut down the amp should the new blower ever fail. Try finding a small blower with high enough CFM air flow and an air flow switch these days can be a real chore. While Grainger and other suppliers had cheaper squirrel cage blowers that would have done the job, none had the required airflow switch. I finally opted for a more expensive fan from a company that custom made squirrel cage blowers: KOOLTRONICS.

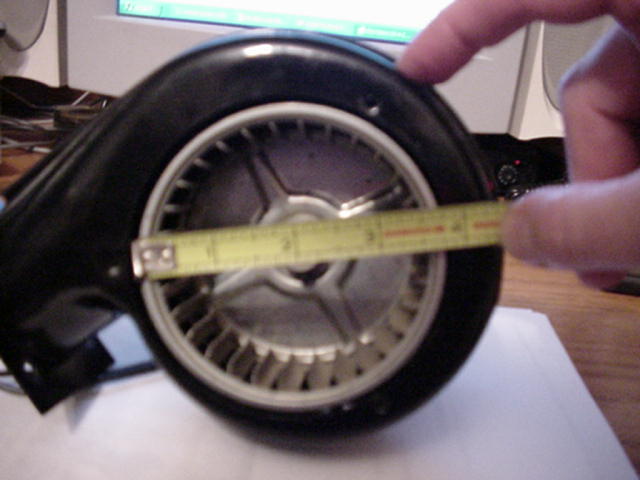
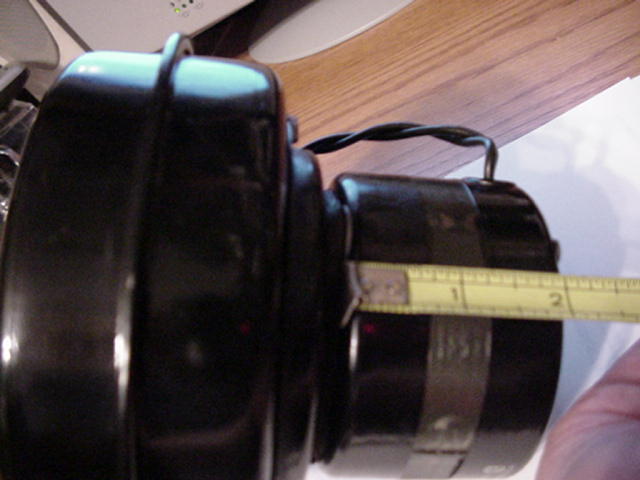
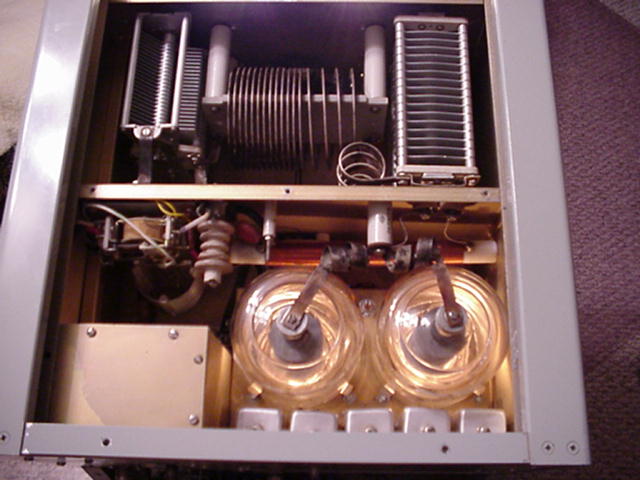
Original Henry Centrifugal Blower
You would think finding and replacing a squirrel cage blower would be a fairly simple job, but doing it right so it would last a lifetime made it a bit more of a challenge. I wanted a replacement blower that would allow for an air flow switch, should the blower ever fail again in the future I wanted the Henry to shut down and stop transmitting almost immediately. Finding a replacement blower, one with a suitable air flow switch would prove to be the problem. After measuring the original blower from all possible angles the hunt was on for a suitable replacement. With several cheaper possibilities available, I decide to go the most expensive route with a custom made blower from a company called KoolTronics the company specializes in blowers for industrial applications. KoolTronics had the exact unit to fit my needs and the air flow switch was installed by the company as an option. Not cheap to say the least, but it's what I wanted in a small compact blower with sufficient air flow to keep the 2X- 3-500Z tubes cool under full power output.
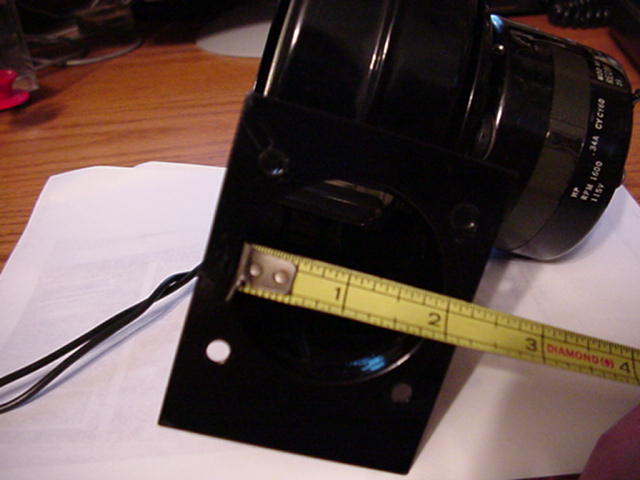
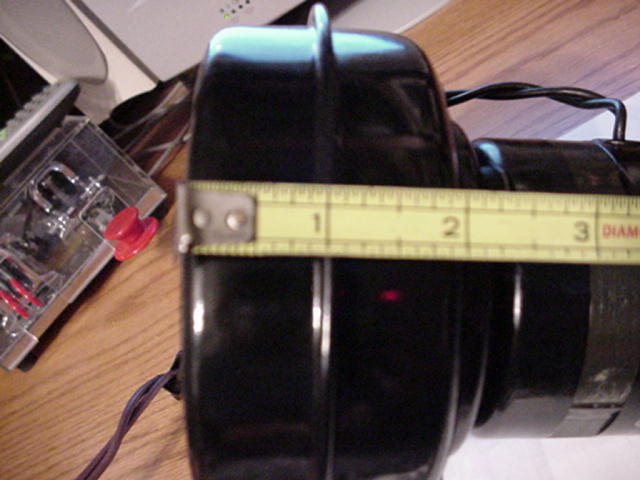
I decided to use the KoolTronics
KBB25 Single Centrifugal Blower
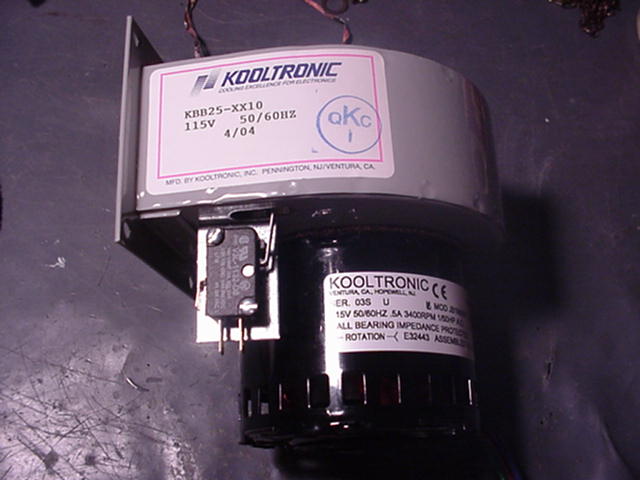

Two 3-500Z final amplifier tubes at 500 watts anode dissipation each required 13.0/CFM Cubic Feet per Minute air flow per tube to do the cooling job required, thus two tubes would require a total of 26 CFM. The Kooltronics fan is custom made because the company usually deals in very large air conditioning and industrial applications. So this is a small job for these folks. The blower I bought is the Kooltronic model KBB25 single centrifugal blower with 60 CFM capacity more then enough air flow to cool two 3-500Z at full output power. For an additional fee the company would install my required airflow switch in the path of the blower and it was guaranteed to work. Should I have tried myself to jury rig a switch on a lesser expensive model blower from some other company, I feared that it would just not be reliable over a long period of time. So I decided to go with the Kooltronics blower, by going the commercial route I bought one guaranteed to do the job right the first time and some times that's worth paying a few extra dollars to do the job right and not have to do it again some day down the line.

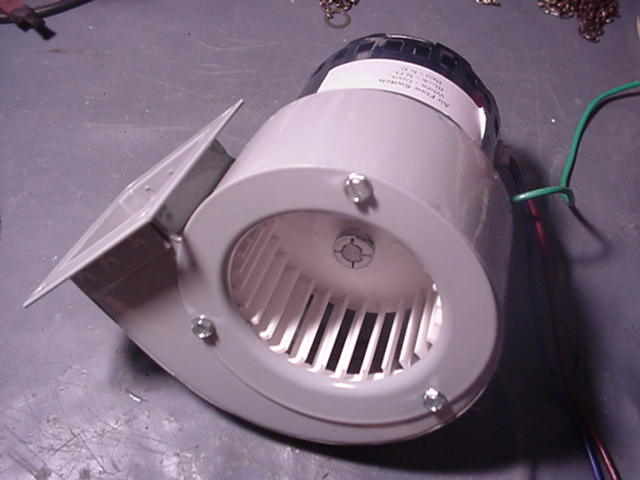
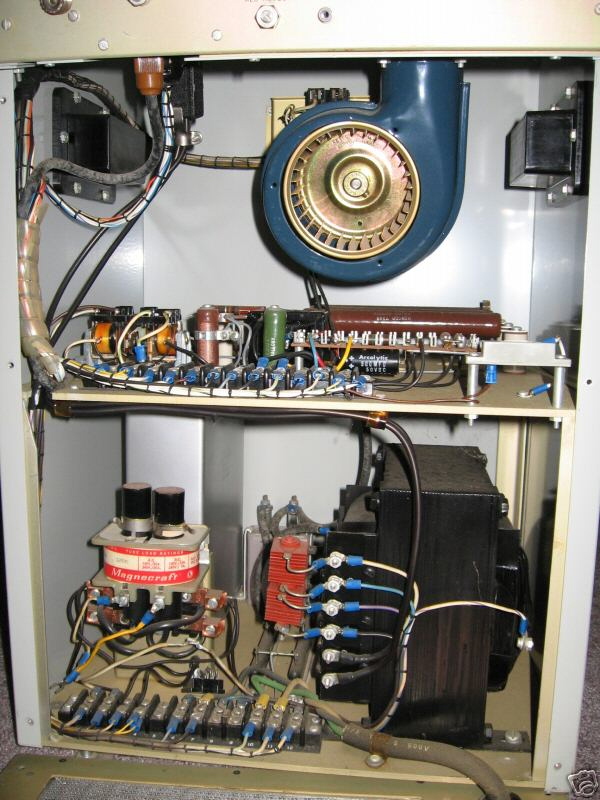
You can easily see the custom installed
air flow switch in this photo.

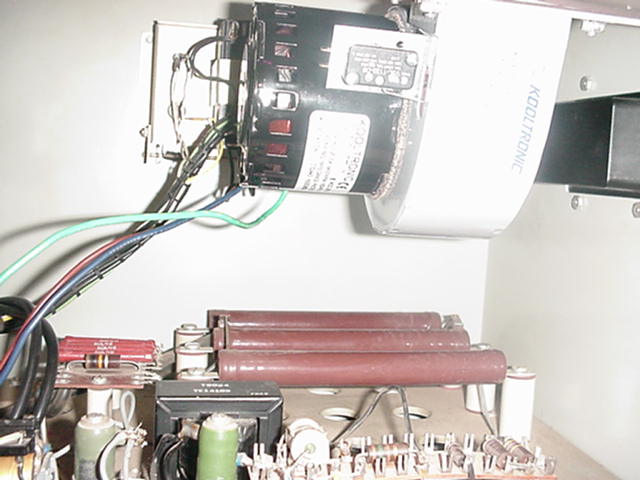
Once the fan arrived, it only required a small amount of modification to the mounting holes along with countersinking the screw holes to allow for the RF deck to slid back in place. The Airflow switch had two sets of contacts. N/O and N/C. Using the normally open contacts, I wired them in series with the rear panel magnetic door safety door interlock as shown in the schematic below. This worked out sweet. The rear panel switch breaks a low-level 12vdc circuit, which then later disengages a much higher current Magnacraft mercury wetted contact relay in the primary of the Peter Dahl H.V. transformer. Placing the fan in series with the rear panel magnetic switch did the job very nicely. Turning on the amp applies 117 VAC to the fan, about 1 second later when the fan reaches full speed, you then hear the relays kick in and H.V. pops right up ~Ta-Da~ Success. After some minor repairs to the filament circuitry , replacing a few burned up bypass capacitors, cleaning up the wiring at the base of the tube sockets, I now have a working 2K-4 with little investment.

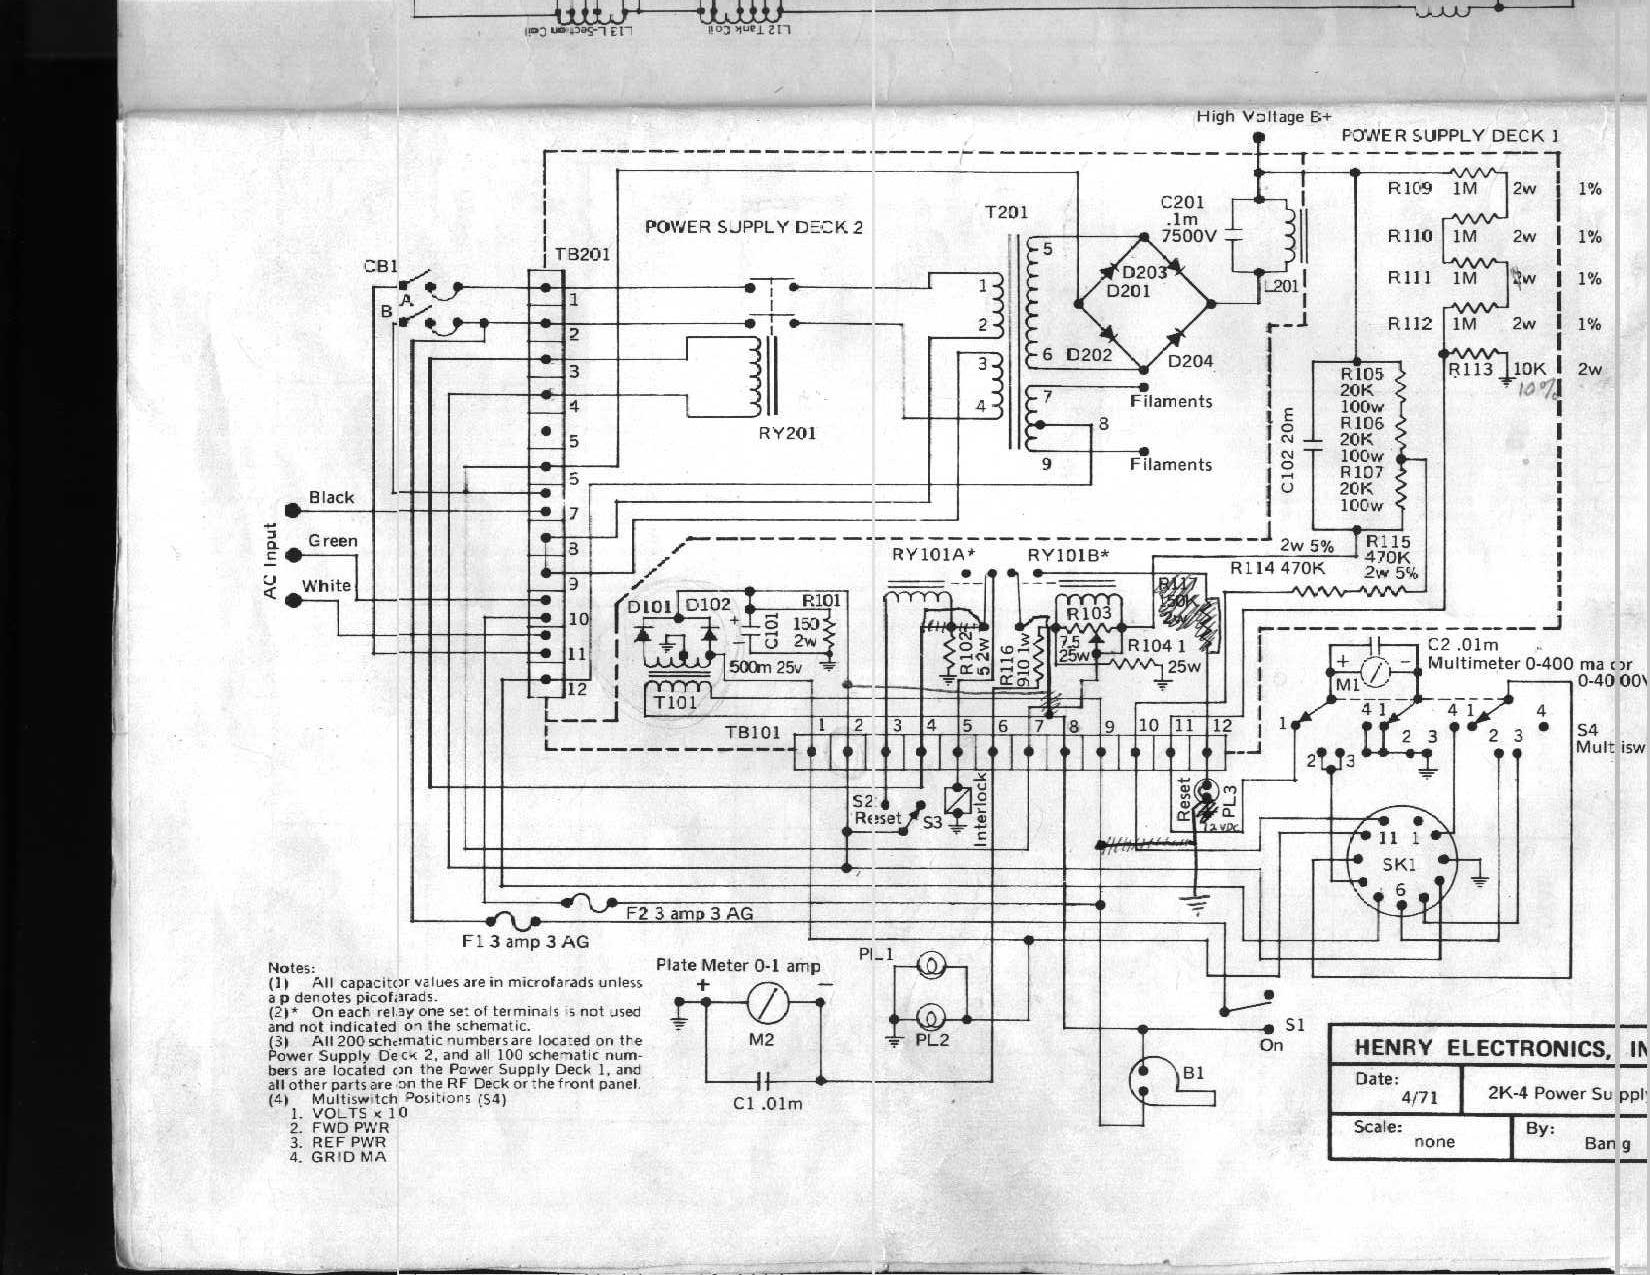
You will note in the schematic (S3) interlock, this interlock resides on the rear panel of the Henry 2K-4.
When opened the amplifier shuts down High Voltage.
The new air flow switch is installed right in line with S3
and acts much the same as if someone were to remove the rear panel.
(Disregard the scribble on the schematic, it's not mine)

With an air flow of 60 CFM and repairs completed to the filament circuit,
we have a working Henry 2K-4amplifier with plenty of air flow to spare flowing through those chimney

Looking into the power supply deck of the Henry 2K-4
you can see Hipersil transformer
HENRY 2K MODIFIED HIPERSIL TRANSFORMER
CORE) A-0518/ C-CORE STYLE # 09 HIPERSIL C-CORE
PR) 120/240 VAC 60 HZ 1 PH
S1) 3500 VAC @ 0.8A CCS
S2) 10.2 VCT @ 15A CCS
WEIGHT 38 LBS
This is what the original transformer looked like in the 2K prior
to replacement with the Peter Dahl Hipersil Transformer above.
Thanks for visiting!
(c) W4CLM 2006. All rights reserved